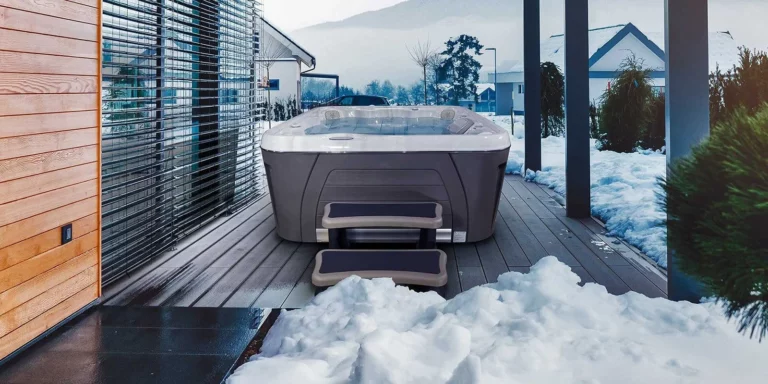
Living on Vancouver Island means we get a bit of everything during the winter. While places like Victoria, Nanaimo, and Comox enjoy milder winters than the rest of Canada, we still face freezing temperatures, intense windstorms, and high humidity.
If you plan to shut down your spa for the season, a half-hearted job can lead to cracked pipes, ruined pumps, and expensive repair bills come spring.
Here is exactly how to properly winterize your hot tub on Vancouver Island, and why every single step is important.
Why Vancouver Island Hot Tubs Need Proper Winterization
Many Island residents think our mild climate means they can just turn the hot tub off and walk away. This is a costly mistake.
Because our winter temperatures hover right around the freezing mark, water left inside your spa’s intricate plumbing lines can expand as they freeze. Even a tiny amount of trapped water can split a PVC pipe or crack a heater manifold.
Step-by-Step Hot Tub Winterization Guide
1. Flush the Lines
- What to do: Pour a specialized flush product (like Spa Marvel Cleanser or Ahh-Some) into the water and run the jets on high for 20–30 minutes before draining.
- Why it’s required: Vancouver Island’s high humidity can encourage biofilm, mold, and bacteria growth inside stagnant pipes over the winter. Flushing removes this hidden gunk so you don’t wake up to a green, smelly surprise in the spring.
2. Turn Off the Power Safely
- What to do: Flip the breaker at the main GFCI electrical panel. Double-check that the hot tub control panel is completely blank.
- Why it’s required: Safety first. You will be working with water and internal electrical components. Furthermore, if the pumps accidentally turn on while the tub is empty, they will quickly burn out.
3. Drain the Water Completely
- What to do: Attach a garden hose to the bottom drain valve, or use a submersible sump pump to empty the tub quickly.
- Why it’s required: Water expands by about 9% when it freezes. If water is left in the acrylic shell, the force of that expansion can crack the shell, which usually damages the hot tub permanently.
4. Blow Out the Plumbing Lines (The Crucial Step)
- What to do: Open the equipment panel. Access your jet pumps and heater. Use a wet/dry shop vac (set to the blowing function) and place the nozzle against every single jet, the filter standpipe, and the suction drains to force trapped water out.
- Why it’s required: Gravity draining only removes about 80% of the water. The remaining 20% sits in the low points of your plumbing loops. On Vancouver Island, a sudden cold snap in January will freeze this trapped water, shattering your pipes from the inside out.
5. Disconnect the Unions and Drain the Pumps
- What to do: Loosen the large PVC union nuts attached to your heater and pumps. Remove the small drain plugs at the bottom of the pump wet-ends.
- Why it’s required: Pump housings are made of rigid plastic. If even a cup of water freezes inside the pump volute, it will crack the housing, requiring a complete pump replacement. Leave these unions disconnected all winter.
6. Clean and Dry the Shell and Filters
- What to do: Wipe down the entire interior shell with a microfiber towel until it is bone dry. Remove your filter cartridges, clean them thoroughly, and store them indoors for the winter.
- Why it’s required: Any leftover puddles will freeze and potentially damage the acrylic surface finish. Storing filters indoors prevents damp Island winter air from causing mold and mildew growth on the filter fabric.
7. Secure the Cover and Tarp
- What to do: Place your hard cover on top and lock the straps. Then, wrap a heavy-duty, waterproof tarp over the entire hot tub and secure it with bungee cords or straps.
- Why it’s required: Vancouver Island winters are famously wet and windy. A heavy tarp prevents torrential winter rains from seeping under the cover and refilling the tub. It also protects your vinyl cover from storm debris and heavy snow loads in higher-elevation areas like Campbell River or Courtenay.
Quick Reference: Winterization Checklist
| Step | Action Required | Main Risk of Skipping |
| 1. Flush | Add line cleaner & run jets | Biofilm and mold growth |
| 2. Power | Turn off GFCI breaker | Electrical shock / pump burnout |
| 3. Drain | Empty via drain valve or sump pump | Cracked acrylic shell |
| 4. Blow Out | Use shop vac on all jets | Shattered internal plumbing lines |
| 5. Disconnect | Open heater/pump unions & drain plugs | Cracked pump housings |
| 6. Dry | Wipe shell, store filters indoors | Surface damage and mold |
| 7. Cover | Lock hard cover + apply winter tarp | Rainwater accumulation & wind damage |
💡 PRO TIP:
Properly blowing out lines, disconnecting internal unions, and ensuring every single drop of water is removed can be a stressful, time-consuming task. One missed step can mean a costly repair bill come spring.
If you want total peace of mind this winter, let the experts handle it! At Rainforest Outdoor Living, we have a dedicated team of professionals who know Vancouver Island weather—and hot tub plumbing—inside and out. We offer comprehensive, professional hot tub winterization services to ensure your investment stays safe, dry, and protected all season long.